Configure Windows Network and Security Settings
This article will show you how to configure your Windows network and security settings (including the firewall) for use with Sonos. These settings are automatically configured while installing the Sonos app for Windows. Only follow these steps if you are experiencing an issue with Sonos. Note that you will need administrator access to follow these steps.
Windows 11
Wireless Connections
- Go to the Start menu and search for Settings.
- Open Settings and select Network & Internet.
- Select Wi-Fi, then select Manage known networks.
- Select the Wi-Fi network Sonos is connected to.
- Under Network Profile Type, select Private.
- Close and reopen the Sonos app.
- If prompted to allow Sonos through the firewall, confirm Private networks is checked and choose Allow access.
Wired Connections
- Go to the Start menu and search for Settings.
- Open Settings and select Network & Internet.
- Select Ethernet, then select the wired network that Sonos is connected to.
- Under Network Profile, select Private.
- Close and reopen the Sonos app.
- If prompted to allow Sonos through the firewall, confirm Private networks is checked and click Allow access.
Windows 10
- Go to the Start menu and search for Settings.
- From the Windows Settings menu, select Network & Internet.
- Select Status from the sidebar, then under Network status, choose Change Connection Properties.
- Ensure the Network profile is set to Private.
- Navigate back to the Windows Settings menu and select Update and Security.
- Select Windows Security from the sidebar, then select Firewall & network protection.
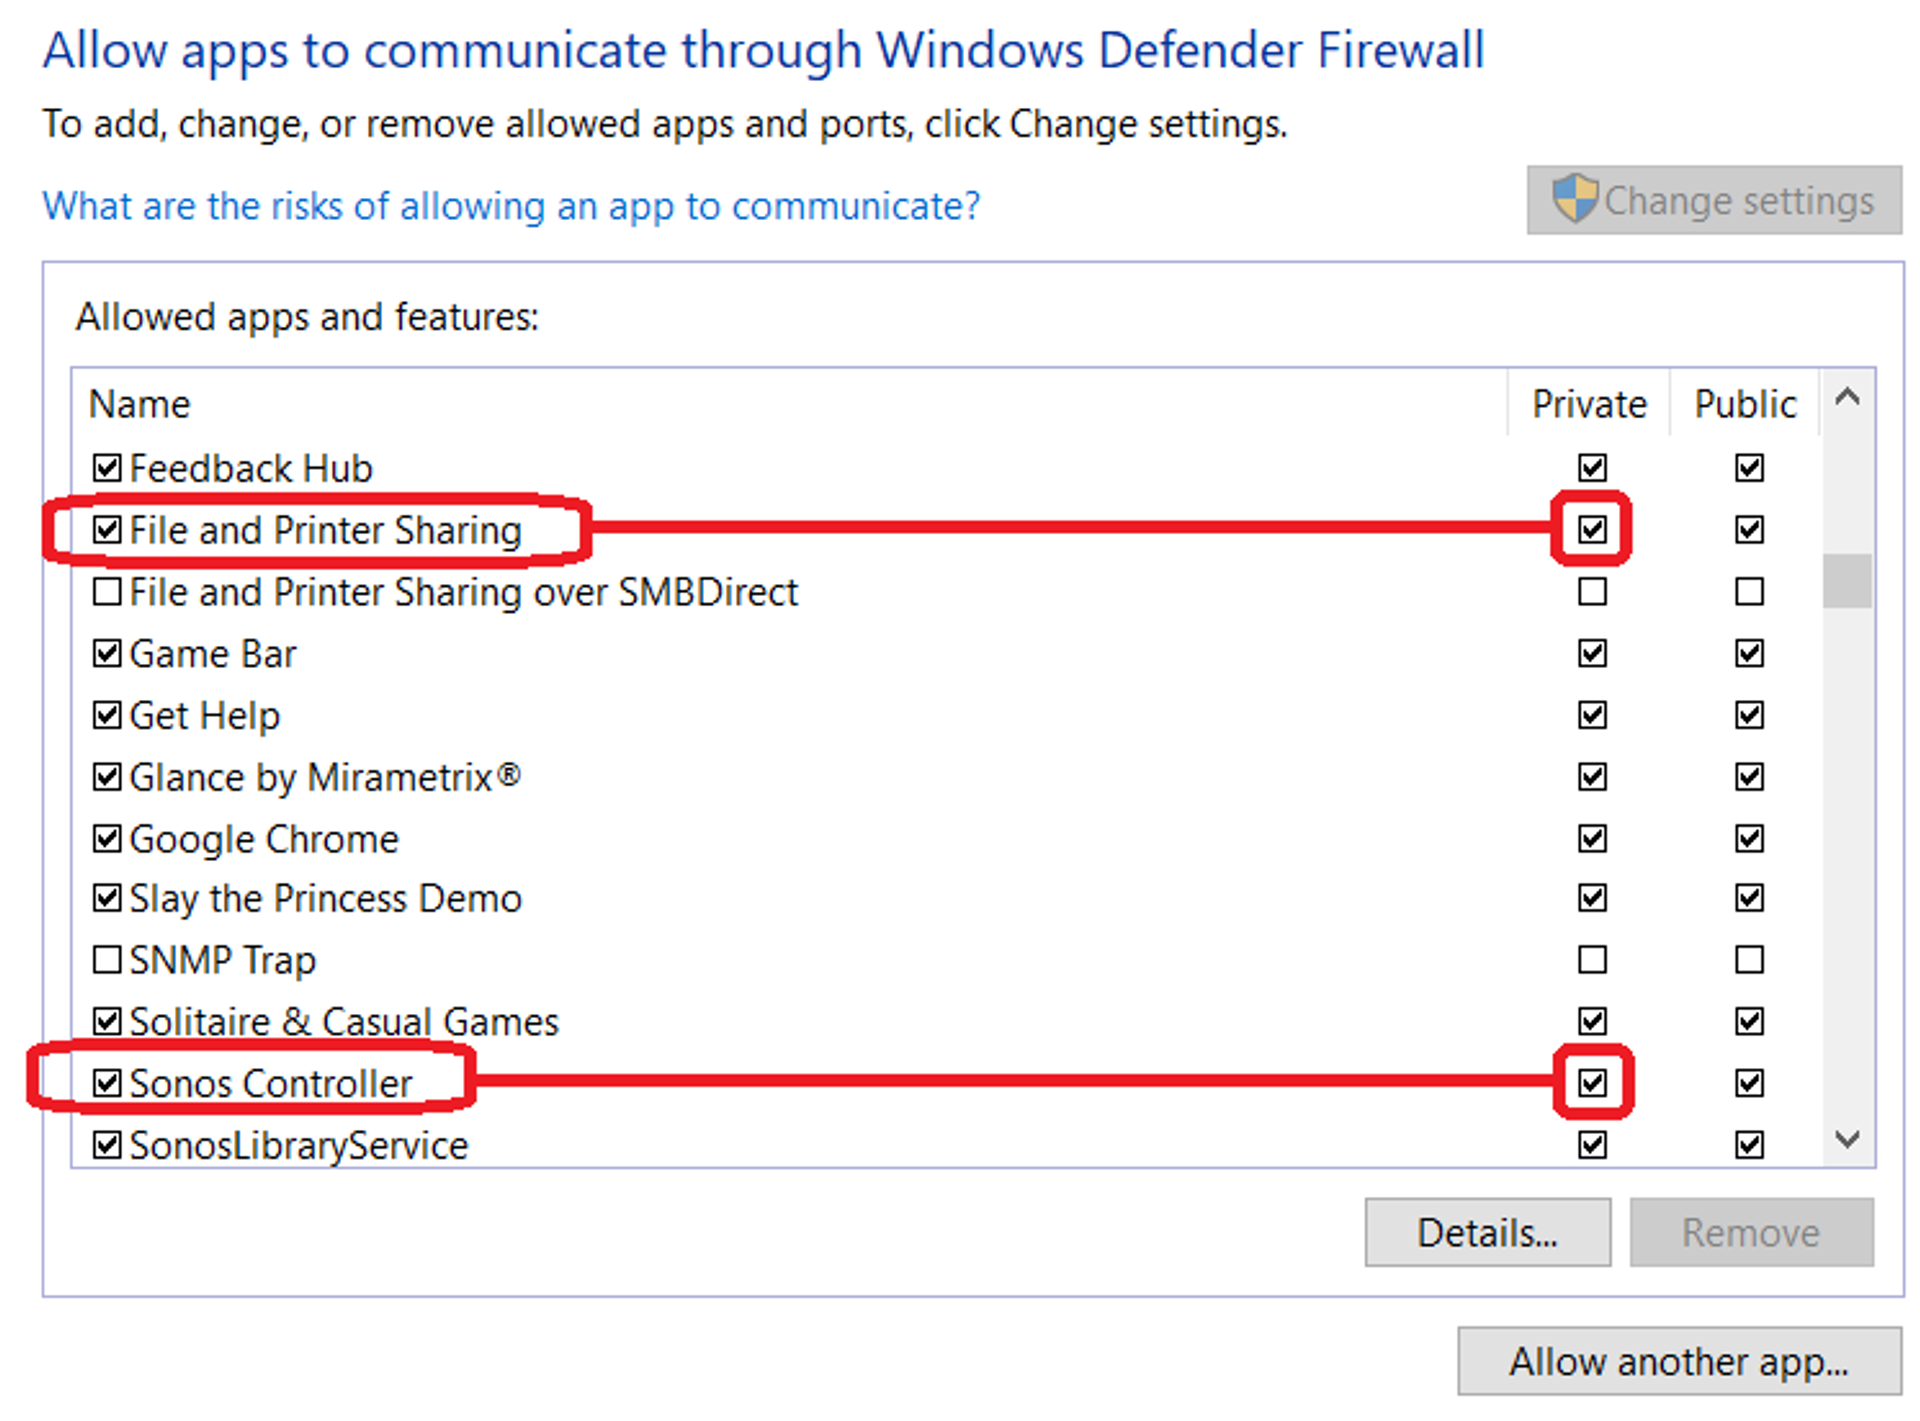
- Select Allow an app through firewall.
- Ensure that Sonos Controller and the column for Private are both checked.
- If you have added or are trying to add a music library, ensure that File and Printer Sharing and the column for Private are both checked as well.